Sunday, October 23, 2011

Workshopping

Last Tuesday, the Garden State Quilters' Guild, to which I belong, sponsored a workshop with RaNae Merril on her Spiral Mandala quilts. These intricate and beautiful quilts are foundation-pieced, and based on twisted log cabin blocks. So, conceptually, they aren't terribly difficult for my engineer's brain to latch onto very quickly. The complexity arises in how you choose to color the patches in each block, and reverse (mirror) symmetry.

We spent the first half of the workshop choosing some basic blocks that RaNae had designed and then coming up with our own color schemes for our "pizza slice" - the workshop mandalas are built from 7 wedges: 4 and their mirror images.

The second half of the workshop was spent assembling the first block of one wedge, following her paper=piecing technique. Prior to this, I had seen some demonstrations of paper-piecing, and watched come video and read some tutorials, but there's really nothing like actually sitting down and doing it with a teacher, especially a teacher who's spent some time and thought on making the process more streamlined.

For example, none of the prior demos I have witnessed showed how to use the "add a quarter" ruler for trimming seam allowances, and I had never seen anyone use a wallpaper roller to "finger press" a seam before. 


Paper piecing is certainly a time-consuming process, and it does seem to have more "waste" than regular piecing, but it would be next to impossible for me to use such tiny wedges of fabric in a design any other way.  Ms Merrill also had us work with that EQ foundation-piecing product that is basically tear-away interfacing that you can run through your printer. One of my guild=mates mentioned to me before the workshop that once I tried it, I would never go back to regular paper for paper piecing again, and she was right. It's more expensive than using regular paper, but it's really forgiving, you can leave it in if you want, and it's translucent so you can see what you're doing on either side of the pattern.

RaNae is a great teacher, and I recommend both the book and her live class.

I've been working diligently on this quilt all week. I've finished 24 blocks out of 40. Here is the center block, arranged on my design wall:

I have 2 smaller blocks completed, and one of them is now sewn onto the center block. The other small block gets attached to a block that's not started yet. I have 2 more blocks to do, but they are, I think, the most complex of all the blocks in this quilt. So far, I have used 25 different fabrics and pieced 384 individual pieces.

Monday, September 26, 2011

Fall Transitions Tablerunner


I had been working on this earlier this month, and actually finished it probably over 2 weeks ago, but I had hoped that my dining room would be put back together by now so I could "stage" this table runner on my mother's beautiful dining table. However, the contractors are not done in our bathroom, and it looks like we just moved into the house. So I had to go outside to take the pictures.


I'm calling this "fall transitions" because the colors remind me of the beginning of fall, when the leaves are just starting to turn, and yet some of them are still green.

The fabrics are from the Bali Pops jelly roll that I've been making small projects from for over a year now - and I still have a decent amount left even after the messenger bag, 2 purses and a table runner. The multi-color batik and the cream batik are from my stash (and leftover from other projects0.


I quilted an overall leaf meander, but I threw in some flowers, tomatoes and a pumpkin. This piece is going to my brother as soon as I can bear to part with it.


And this is the back:


Monday, September 12, 2011

Some Dolls

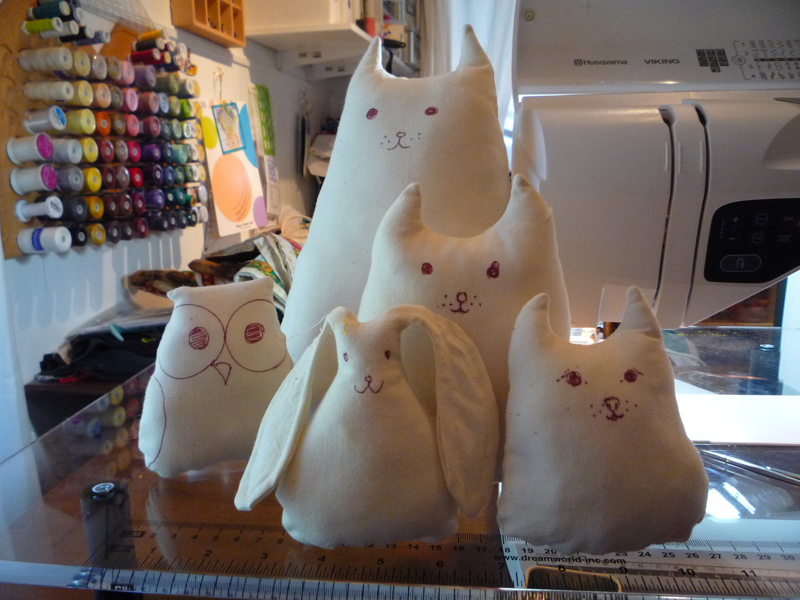
I was experimenting this morning and made some quick doll patterns and then made up some prototypes out of muslin. These went together very fast, but I can see myself spending a lot of time with embellishments. I will likely be selling the "real" versions in my Etsy shop next month.


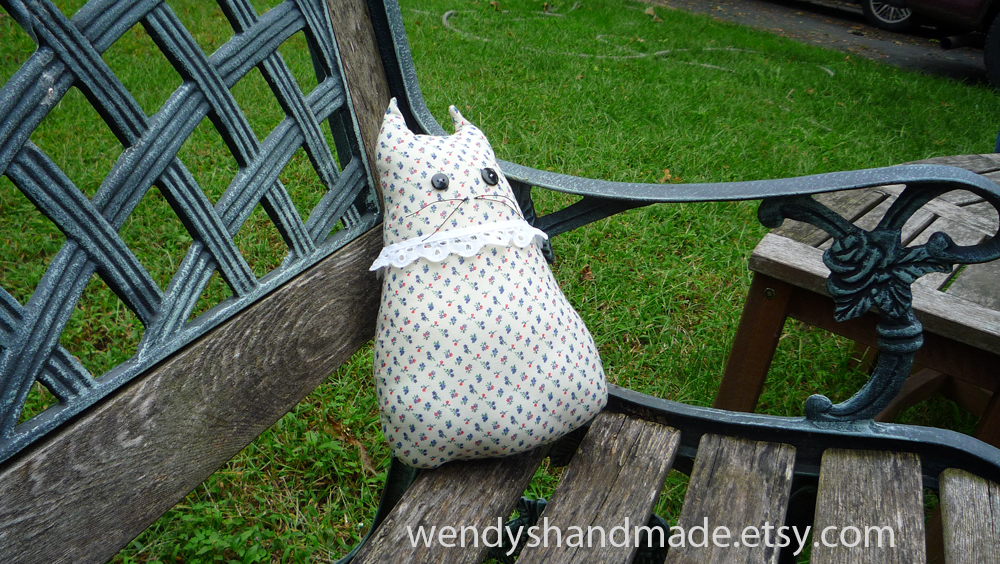
All this started because I am donating this finished UFO to the April's Army charity shop for September. I think I cut this out from a commercial pattern between 30 and 40 years ago, as I made a couple of them back then, and I came across it recently doing some cleaning. So I finished it up.

It's a calico cat. This one isn't good for children under 3 because of the button eyes. But I think it's very cute.

Sunday, September 11, 2011

Ten Years Later

My 9-11 post is on my music blog, since it contains a song. I invite you to listen and read.
http://mftgoddess.blogspot.com/2011/09/tuedays-lament.html

Sunday, July 17, 2011

"A Moment of Zen" part 2

Now that the submission deadline is past, I feel comfortable showing the rest of this quilt. We had left off with the central yin/yang circle in its fabric frame. I took the challenge fabric (and some other Hoffman fabric from my stash - an alternate colorway of the 2008 challenge - a bit of a private joke for me) and fussy cut the fish parts, and positioned them on the background:

The fusible web I tried for this quilt is Shades SoftFuse and I was really very pleased with it. I've tried most fusibles on the market, and the last heavily appliqued quilt I made was very stiff and hard to sew through once you got 3 or more layers glued down. This stuff may not be as adesive as some other fusibles, but it works great (I would recommend always sewing the edges down with this product), and it does not add a lot of bulk or stiffness to the fabric. It really does work as advertised, and I'll be buying more of it in the future.
 
If you look closely, you'll see that the red "scales" on the purple fish (and the feathering in its tail) are petals from the challenge flowers. The gold dorsal stripes are also cut from the challenge fabric, as are the "whiskers" on the top fish. The fish on top is composed completely from the challenge fabric, using the flower petals for the front part of the fish, and some fussy-cut leaves for its fins. The fins on the bottom fish are composed of peacock feathers from the other fabric.

I  agonized over border designs for days. I didn't want to detract from the center of the quilt, and I wanted something pieced. I poured through the Oriental design books I had in the house, and my inspiration came from a Dover book "Japanese Design Motifs" which is basically a collection of family crests from the 19th century. Virtually every shape, animal, and trade are represented in that book, but that's where I got the idea for interlocking squares.

I fired up EQ7 and designed 2 blocks: one for the end squares and one for the inside squares. I made the decision not to foundation-piece these, and I lived to regret it. It was quite a challenge to piece these, but I got it done.

I then tried a trapunto-type technique where I sewed a layer of batting around my fish and then cut it away from the non-fish areas before making my sandwich.
Quilting, next:
And a view from the back. I didn't do too much quilting, because I didn't want to take away from the fish, and I didn't want to screw the quilt up. almost all the quilting was done with Sulky invisible thread on top and white thread in the bobbin. This combination seemed to work really well and I hardly had any thread breakage at all.
I got the binding on (the same fabric as the dark part of the yin/yang symbol in the center), and then needed to figure out something for the corners. They were rather bare. I had attempted a quilted motif in one corner, but I hated how it looked and picked it out. The emptiness does give the eyes a place to rest, which I thought was nice. I finally, after consulting with some friends on the quilting group at LiveJournal, decided on some beading.


I made a floral cluster of 6 beads in the intersections of the border pattern, and beaded a fringe with some lovely iridescent amber glass pony beads and some copper flat beads that I picked up at Costume Con this past April.
And here is the finished quilt, which is now in the hands of the Hoffman Challenge judges.

Thursday, July 7, 2011

Hoffman Challenge, 2011: "A Moment of Zen"

I am very pleased to announce that I have an entry for this year's Hoffman Challenge in a Priority Mail box waiting to be taken to the Post Office today. I had been stuck on what to do with the gorgeous oriental print that is this year's challenge fabric for months on end.


I knew I wanted to do something with applique; and to turn the print "on its head", so to speak. I didn't want flowers to be the main theme, and I wasn't going to try to some crazy pieced thing because I've looked at the previous years' winners in that category, and I simply didn't have enough time to attempt something like those.

So I was kicking around a lot of ideas, and then I discovered an artist on Etsy, Kailey Lang, who is just fabulous. I bought some of her fish prints, and I just really started to love the visual look of koi fish, and the concept for my challenge quilt presented itself to me. The concept is not new, and it even showed up in Avatar: The Last Airbender  as Tui and La.


I sketched a fish, and then traced that sketch onto vellum:
These were retraced onto freezer paper to make templates.

I further constrained my design process by limiting myself to stash fabrics. This is fine with me as I have a large collection of Asian prints, and I got to use an out of print Hoffman fabric which was an alternate colorway to the 2008 challenge fabric (I find this amusing, and I hope it's not lost on the judges). I also used some fabrics I purchased to audition for the last Hours in the Garden quilt I made for my niece's wedding, but didn't make the cut for that quilt. they worked perfectly here. for my Yin/Yang base.


I used a waste bin as a large circle template and cut 2 circles of light and dark material  Then I think I drew the inside curve in chalk and freehand cut with a rotary cutter through both light and dark layers, leaving me enough to make 2 of these. Then a lot of pinning ensued and I slowly pieced the 2 pieces together. I clipped the outer curves at sewing time to ease the fabrics together, and they laid perfectly flat when I pressed them towards the dark fabric. The background is completely pieced, and not applique.

Stay tuned for Part 2, where the quilt really starts to take shape.

Tuesday, June 21, 2011

Summer Solstice

Today is the summer solstice and I just received a big box of sale batting from Connecting Threads.  I purchased one or 2 pieces of a few different types of batting to experiment with and see what I will be using as my "go-to" batting going forward.

I got several packages of these:

 Hobbs Heirloom Wool Batting
 Hobbs Heirloom 80/20 Batting
 Hobbs Heirloom 80/20 Fusible Batting

I've heard noting but great things about wool batting, so I got some during the sale - it's still kind of pricey but at a sale price is comparable to other battings when they're not on sale.

I am very interested in the 80/20 fusible. I only have a "domestic" machine, and  I have issues keeping all my layers flat while quilting anything larger than a placemat.  I used a fusible 100% poly batting on the cat quilt, and, while the actual quilting was manageable, I was not happy with the loft and the flatness of the poly batting, and I'm hoping it softens up decently after washing (I didn't have time to wash the quilt after finishing it) like the package said.

I'm hoping the Hobbs will be a better choice for me. I'm looking forward to experimenting.

Now I have to piece some more tops!

Monday, June 13, 2011

A lap Quilt For Two

This weekend was the wedding for one of my good friends, someone I've known for almost 30 years, and like a good quilter, I decided to make him a quilt for a wedding present. I was completely unsure about the color scheme in his residence, so I kept it to neutral colors. The Quilt was designed in EQ7, modifying one of their foundation-pieced block patterns, and doing a lot of redesigning on the fly, as I could not figure out how to get this particular layout to work properly in the program.

As you can see in the EQ7 design the borderd squares are composed of 4 blocks with a cross inside, instead of a square block with pieced sashing and a 9-patch keystone block - which is how I constructed it..

From start to finish took me 5 days of very concentrated effort. I paper pieced the cats.

Here is the finished quilt:


And some photos of the quilting detail.


I could have done more, but I had only a handful of evenings to get this quilted in time for the wedding. I used a fusible polyester batting, because it was fast. I'm OK with the results - I just wish I had more time to spend on it so I could have used a batting with a bit more loft and a bit softer.

I will be writing up this pattern, and showing some alternate design options - like this one:

Had I been confident the recipients would have liked a rainbow quilt, I would have made this for them. But the one I made is a more elegant presentation.

Saturday, June 4, 2011

quilt for Joplin, Finished

It's a bit small for a grownup, but should work really nicely for a child between 5-12. I had a lot of fun quilting the solid borders - so much so that I may do some more solid color quilts in the future. Used 8 bobbins for this. The quilting took twice as long as the piecing, and the binding about as long as the quilting. I did stitch-in-the-ditch in the center. I hope whoever receives this in Joplin enjoys it. I still have to do a label but that can wait for tomorrow.

Quilt top

Quilted and bound
Back of Quilt
Quilting detail

Friday, June 3, 2011

Quilt for Joplin (WIP)

Quilt for Joplin, MO, and part of the 30 Days of Creativity challenge.

Still needs some wide borders to make it large enough for a teen/adult. I'm not sure who this is going to - our guild is collecting quilts on Monday to send/bring to Joplin.

Wednesday, May 25, 2011

My first quilting pattern is published!

Picture Purr-fect, a crib-sized beginner quilt that will teach you how to make half and quarter-square triangles and sew on the bias, and also make a lovely on-point baby quilt.

The top goes together very fast, and is fun and easy. More advanced quilters can quickly adapt the piecing techniques to larger quilts.

You can order hard copy or digital editions (or both -  if you order hard copy, the digital edition is FREE) from Magcloud. PDF versions are also available in my Etsy store.

.


EDIT:: I first made this quilt 13 months ago, and blogged about it here: http://quiltiliciousjourney.blogspot.com/2010/04/quilts-for-kids-ready-to-ship.html

I am amused that I said check back in a few weeks and I'll have a pattern... I guess "few" is 57.

Tuesday, May 3, 2011

CostumeCon 29

I The weekend is loong over after 2 days back at the office. We (well I) had a great time - it was the first convention in years where I went to panels and workshops all day long. I will have some more photos of great costumes to show you, but until then, you'll just have to make do with this awesome hat I purchased in the dealer's room.


Oh, and t his costume that won a bunch of prizes in the Sat.night Masquerade.
Yes, it's a Dalek made from grass skirts, coconuts, leis and a tiki torch.

I really want to see it next to someone wearing a wooden Bender costume :)

Thursday, April 28, 2011

An Artistic Interlude

Haven't done much quilting in the past week or so - waiting for my last entry in the show to come back from the long-armer, and starting to build a Steampunk costume. I got the pants done in time for Costume Con this weekend (which I am attending), but it really needs a blouse and a jacket (and a hat and proper shoes) before I'll be happy satisfied with it. The pants are from  Folkwear's Big Sky Riding Skirt. I'll blog about that in the future, after I have some photos to show you.

In the meantime, I've been sketching. I have been rather obsessed with octopi for some reason. I did this one during a meeting the other day


And then when I got home that night, I dug out my vellum marker paper and freehand sketched this one with a fine-point sharpie. I may render this as a vector graphic.


I'll need to scan this in instead of photographing it with my crappy camera.

Wednesday, April 6, 2011

Iron Craft Challenge 14

As you may have noticed, I'm not quite so "Iron" in my Iron Crafting, as I've missed a few weeks here and there. It seems I can get one or 2 a month done, what with everything else that's going on in my life. This week's challenge is called "Wish You Were Here" and it was to create an postcard-sized Artist's card. Since I've been seeing a lot of fabric postcards online, and have been vicariously participating in a swap, and also after Elsa Hahn's fabric postcard demonstration at last weekend's Harvest Quilter's Guild show, I thought it was time I finally made one.

I used a 4x6-inch piece of very heavy Pellon interfacing (from the bolt I bought at JoAnn's at a 40% off sale that I use for purses and faux corsets for costume) and some of my favorite scraps for the fabric part of the card. Some Yellow Submarine fabrics, Laurel Burch cats, some batiks and a print I quite like made up my fabric collage.

I used some of the decorative stitching on my machine and some free-motion quilting and sewed all the pieces down. Once that was done, I glued the tiny quilt to a postcard backing - I used one of my (literally) hundreds of promo cards from my second CD release and sewed that together around the edges using a decorative stitch and a straight stitch (after the machine made a scary noise and I didn't bread a needle, but got paranoid).

Here is the result. Presenting "Fabric Postcard #1"


There will be more. Stay tuned.

Monday, March 28, 2011

Another Hour in the Garden

I'm invited to a number of weddings this spring, and when I heard that one of the bride's bedrooms is decorated in "blue and beige", I knew I was going to make her an "Hours in the Garden" quilt. This one is done entirely with batiks, and is not quite as large as the first one, because I wanted to use the wholecloth quilt backing I purchased on my Wisconsin trip in October 2009, and that's "only" 108 inches wide. (the first Hours in the Garden quilt was a whopping 117" square)


I will be writing this pattern up for sure over the next couple of months, as I can squeeze the time in to do so. I took copious notes during construction of this quilt. The quilt is also going to be entered in the Garden State Quilters' guild show in May, which is a couple of weeks before the wedding.

Here are a couple of in-process photos:
Working on the border

Center section completed

Another view, in the very warm light of dawn

And our youngest cat, Luna, who must get involved in any quilting activity.

Friday, March 11, 2011

More Hours In The Garden

About two-and-a-half years ago I had my first commissioned quilt. By the end, I had named the pattern "Hours in the Garden" since it used the Hourglass block and a Garden Patch variation block as a base.

Here is the original quilt, staged on a bed (it's too big to hang anywhere  in my house to get a decent photo:


Now, I'm starting another one and this one will be heading off to another owner when it's finished as well. I am also taking very detailed notes as I construct this, as I plan to release this quilt as a pattern this year. I have chosen my fabrics for the new quilt today. This time I'm using all batiks:


I like to keep a swatch record of my fabric selections. I've also numbered/lettered all the different fabrics in the quilt (I usually don't do this when I'm just making a quilt on my own). This quilt uses 10 different fabrics, with 6 of them being mid-to-dark range blues. It's easy to get them mixed up. The last quilt took me 40 hours of construction time. I'm hoping I can do at least as well with this one. Stay tuned!

Wednesday, March 9, 2011

Iron Craft 10 - Fat Quarter Challenge

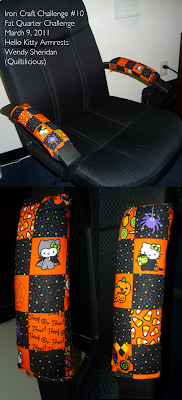
What's a quilter to do with one fat quarter? Well, I desperately needed some padding on the chair I use in the office at work, as the solid plastic is very hard on my elbows (I'm a leaner when I'm sitting at the computer and I'm at the computer all day long at work).

So I whipped up these arm rests using stash fabric and leftover upholstery batting from a failed attempt at reupholstering a sofa.


It's basically a "pillowcase" that's been stuffed with batting and sewed shut. What you can't see in the photos is the 2-inch wide "industrial" Velcro underneath, holding it all together. There are 6 layers of batting stuffed in there, and it's barely soft enough. I probably should have used cushion foam to stuff it, but that's harder to work with (and a lot messier!).

Sunday, March 6, 2011

White Gloving at Mancuso Quilt Fest of NJ VII

I have never been a :"white glove" volunteer at a quilt show before, but I had a good time doing it, and I'll probably volunteer again in the future, because you get to touch the quilts!  The Garden State Quilters had a booth at the Mancuso show this weekend, and I volunteered for a white glove shift.

I got there a couple of hours early so I could see the show and do a little shopping. I now know where to get in-person fabrics - there was one vendor there with their entire fabric store, but their cutting line was 30 people long (I am not kidding) and I didn't have time to peruse their "on the bolt" selection, but a lot of it looked very yummy, let me tell you.

I did not take pictures of every quilt, or even every quilt that I really liked. Some of the highlights were seeing the 2010 US Hoffman Challenge exhibit (I would have loved if they included the UK winners as well.), and the blue ribbon winners from some other Mancuso competitions.

There was a black and white (and orange) quilt that was just beautiful, which was basically a double-sided quilt. When I was doing my "rour" of the space, I couldn't locate a white gloves person to show me the back of the quilt, so when I got my gloves on, the first thing I did was look at the back of that quilt. I thought I took photos, but I guess I didn't. All I can say is that it pays to read the story cards for the quilts because otherwise, you'll miss details like that. I did spend some time surprising other visitors who were examining that quilt by showing them the back.


The colors in this quilt are not "my style" but it's very well executed and very pleasing to look at. The quilting is also really REALLY well done.


I had been walking past it for a couple of hours before I really took a close look at the story card and realized the entire quilt was hand-quilted.  That cross-hatching is maybe 1/4-inch square. Her stitches are so even and tiny that you think it's machine-quilted when you take a passing look at it. Click the photo above to see a close up of this work. Amazing!

One of the show attendees had me pull the quilt back so she could show some of her friends (or students?) the label for this quilt. She wanted to show them that quilt labels can be quite decorative and become an integral part of the quilt design, and encouraged them to move beyond a simple muslin square.

This quilt was one of my favorites, mostly because of the subject. I was even more impressed when I read on the story card that the quilter hand-dyed the fabric used for the calico patterning. What you can't see too well in either of my (mediocre) snapshots is the fabulous red feathers quilted in the dark portions of the quilt.

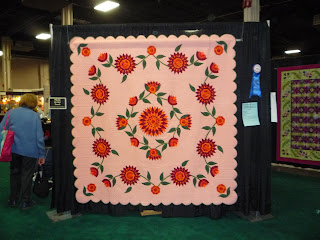
This quilt had a lot of Savorski crystal bling on it - especially in the center of the flowers. Most of the quilting was done with metallic threads. A woman had me show her the back of this quilt, and under the appliqued flower blossoms on the front were quilted completely different flowers on the back (these were covered by the applique on the front). The flowers on the back were highlighted with some metallic fabric paint to make them show up a little more. The woman then spent the next 10 or so minutes deconstructing the quilt for her friend (and me), which I found very informative. This quilt also featured pieced prairie points, some awesome applique and some very meticulous and exacting machine quilting.

I had a great time looking at all the eye candy and being allowed to fondle the quilts. It was a bit humbling, seeing all these magnificent pieces of fiber art on display, but I'm not discouraged. I am inspired. It makes me not want to work on the project I have to do this month, since I've already done one of these quilts before, but I have a niece getting married in May...